26 Jan 2008

ivtv scanner and tuner

with my new pvr-150 from hauppauge i was wondering how to scan for channels.

it seems quiet simple:

echo "" > channels; 
c=0;
while [[ $c -lt 255 ]]; do
ivtv-tune -c $c | grep "Detected" | awk '{print $2"\t"'$c'}';
c=`expr $c + 1`;
done >> channels & \
tail -f channels

The above scanner scans by channel, this is not optimal if you are living in a not-so-well-known region and you have a brain dead tv provider which doesn't make the frequency table available online (like eblcom.ch a subsidary of cablecom).

the example below will scan by frequency rather than by channel:
#!/bin/bash

## begin config
start="170.000"; # float, must provide 3 decimal digits
end="1000.000"; # float, must provide 3 decimal digits
step="250"; # int, seps by thousands
file="channel.txt";
## end config

c=`echo $start \* 1000 | bc | sed -e 's/\.000//'`;
end=`echo $end \* 1000 | bc | sed -e 's/\.000//'`;
detected=0;
fstart=0;
fend=0;
last=0;

channel=0;

while [ $c -lt $end ]; do
freq=`echo "$c" | sed -e 's/\([0-9]\{3\}\)$/.\1/'`;
# echo "$c | $freq";
r=`ivtv-tune -f $freq | grep Detected`;
c=`echo "$c + 250" | bc`;

if [[ $detected == 0 ]]; then
if [[ -n "$r" ]]; then
fstart=$freq;
detected=1;
fi
else
if [[ -z "$r" ]]; then
fend=$last;
detected=0;

#echo "scale=3; ($fend - $fstart) / 2 + $fstart";
med=`echo "scale=3; ($fend - $fstart) / 2 + $fstart" | bc`;

echo "$channel $med";
echo "$channel $med" >> $file;

channel=`expr $channel + 1`;
fi
fi

last=$freq;

done


and here is a simple bash tuner
#!/bin/bash

# config
device=/dev/video0;
channels=~/.channels
lastchannel=~/.lastchannel
channel=1;
frequency=0;

if [[ -f "$lastchannel" ]]; then
channel=`cat $lastchannel`;
fi

# start mplayer
mplayer -vo xv /dev/video0 -ao sdl $device 2>&1 >/dev/null &
mplayerpid=$!;
echo "pid of mplayer: $mplayerpid";

# tun into other channel
function tune {
frequency=`cat $channels | awk '/^'$1'\t/ {print $2}'`;

if [[ -z "$frequency" ]]; then
echo "unknown channel $1" > /dev/stderr;
return 1;
fi

echo $1 > $lastchannel
channel=$1;
ivtv-tune -d $device -f $frequency 2>&1 >/dev/null&

return 0;
}

# tune default channel
tune $channel;

# main loop
while true; do

# read input
echo -en "Channel $channel/$frequency [or +/-] "; read c;

# validate input
c=`echo "$c" | sed -e 's/[^q0-9\+\-]//g '`;

# +/- change channel ?
if [[ "$c" == "+" ]]; then
tune `expr $channel + 1`;
continue;
fi

if [[ "$c" == "-" ]]; then
tune `expr $channel - 1`;
continue;
fi

# quit ?
if [[ "$c" == "q" ]]; then
kill -TERM $mplayerpid 2>/dev/null;
break;
fi

# numeric channel
if [[ -n "$c" ]]; then
tune $c;
continue;
fi

echo $c;
done

exit 0;

22 Jan 2008

Ubuntu Gutsy & Zattoo

works, but after some glitches. Zattoo (like many other commercial applications udner linux) uses OSS instead of ALSA. Why? Is OSS more *nix compatible ?

Anyway, as suggested, if you are using ALSA you need some glue to OSS to make many strange adio/video apps working (like flash player). This is true for zattoo too.

# sudo apt-get install alsa-oss

Then start Zattoo with
$ /usr/bin/zattoo_player

12 Jan 2008

Metropolis - Open SimCity

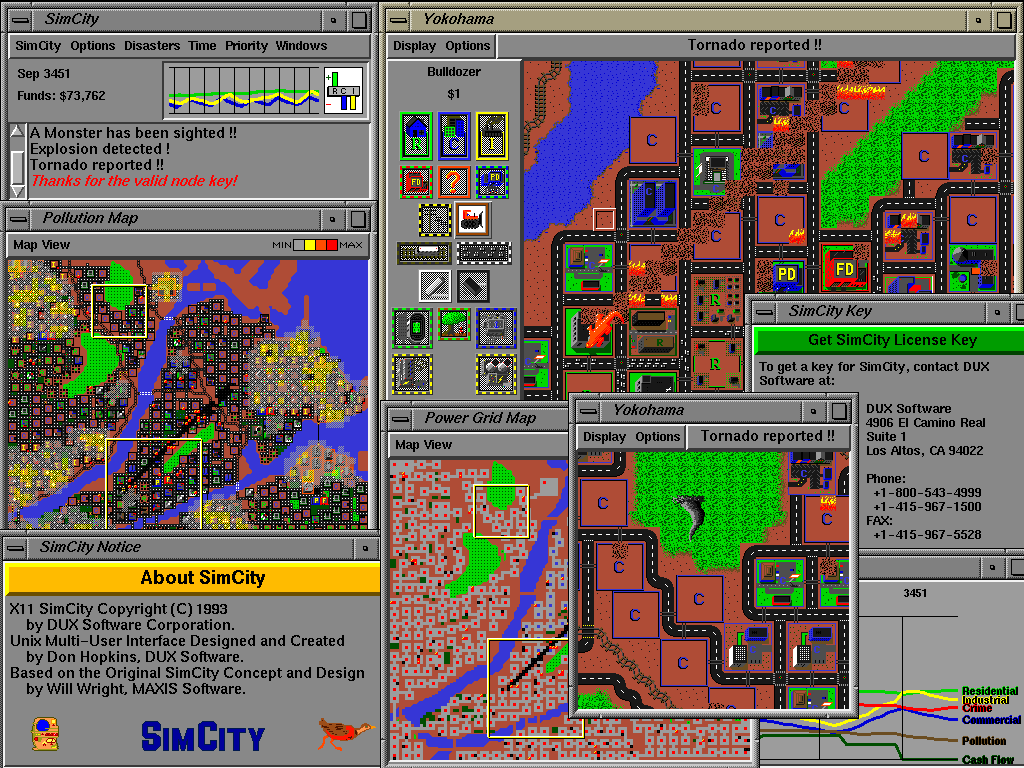
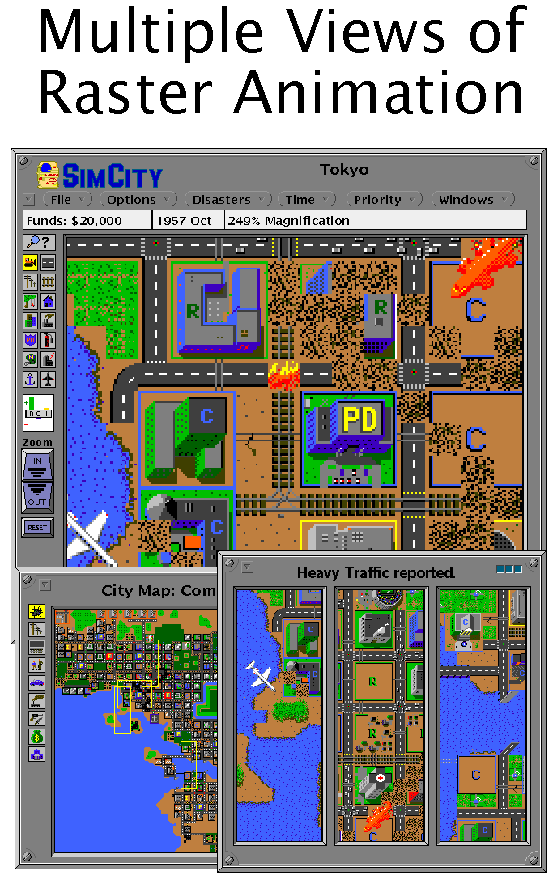
SimCity was was released as opensource project with the code name Metropolis by Don Hopkins. There is not a lot of information available yet, i have skimmed the wiki so far.

Unfortunately, it does not work on Ubuntu Gutsy, this is what I get after installing the x86 build on my 32bit ubuntu install (i had to install yacc and libxpm-dev manually).

$ sudo apt-get install -y yacc libxpm-dev
I can only get to the main menu, it looks like this:


When I run the game the game starts but does not react to any user input:
spliffy@splatter:~/Desktop/micropolis-activity$ sh ./Micropolis -S
Starting Micropolis in /home/spliffy/Desktop/micropolis-activity ...
Welcome to X11 Multi Player Micropolis version 4.0 by Will Wright, Don Hopkins.
Copyright (C) 2002 by Electronic Arts, Maxis. All rights reserved.
sh: Syntax error: Bad fd number
Adding a player on :0.0 ...
Cool, I found the shared memory extension!

Micropolis has been terminated by a signal.
Pick a window -- you're leaving!


spliffy@splatter:~/Desktop/micropolis-activity$ sh ./Micropolis
Starting Micropolis in /home/spliffy/Desktop/micropolis-activity ...
Welcome to X11 Multi Player Micropolis version 4.0 by Will Wright, Don Hopkins.
Copyright (C) 2002 by Electronic Arts, Maxis. All rights reserved.
sh: Syntax error: Bad fd number
Adding a player on :0.0 ...
Cool, I found the shared memory extension!

Micropolis has been terminated by a signal.
Pick a window -- you're leaving!
Does someboy know how to fix this? i am really looking forward to play SimCity :)

Screenshot:


7 Jan 2008

continous read from bash pipe

Pipes are great, I love pipes. This is the reason I love the unix way of live, thousands of small utilities (if you know them) which usually read from /dev/stdin and output to /dev/stdout. So simple and powerfull that it is often overseen (by gui users). Tese examples are for bash:

Creating a pipe

mkfifo /tmp/pipe

Continously reading from a pipe:
while true; do
if [[ ! -p /tmp/pipe ]]; then break; fi
l="`cat /tmp/pipe`";
echo "$l";
done &

Writing to the pipe:
echo -en "a\nb\n" >> /tmp/pipe

bash completion for SQL*Plus -- sweet!

just found the following script from Kris Rice:

------FILE-------
_sqlplus()
{
local cur
COMPREPLY=()
cur=${COMP_WORDS[COMP_CWORD]}
prev=${COMP_WORDS[COMP_CWORD-1]}

if [ $COMP_CWORD -eq 1 ] && [[ "$cur" == -* ]]; then
# return a list of switched
COMPREPLY=( $( compgen -W '-H -V -C -L -M -R -S' -- $cur ) )
elif [[ "$cur" == "/" ]]; then
# only /nolog is possible
COMPREPLY=( $( compgen -W '/nolog' -- $cur ) )
elif [[ "$prev" == "as" ]]; then
# as sysdba sysoper
COMPREPLY=( $( compgen -W 'sysdba sysoper' -- $cur ) )
elif [[ "$prev" == "-R" ]]; then
# added for completness
COMPREPLY=( $( compgen -W '1 2 3' -- $cur ) )
elif [[ "$cur" =~ "@" ]]; then
# if @
base=${cur:1}
COMPREPLY=( ${COMPREPLY[@]:-} $( compgen -f -P "@" -X "$xspec" -- "$base" ) $( compgen -d -P "@" -- "$base" ) )
elif [[ "$prev" =~ "@" ]]; then
# if @
COMPREPLY=( ${COMPREPLY[@]:-} $( compgen -f -P "@" -X "$xspec" -- "$cur" ) $( compgen -d -P "@" -- "$cur" ) )
elif [[ "$*" =~ "/" ]] ;then
# already has a / assume it's the pass
COMPREPLY=
else
#default
_history
fi
}
complete -F _sqlplus $nospace $filenames sqlplus


_history()
{
local cur
cur=${COMP_WORDS[COMP_CWORD]}
COMPREPLY=( $( compgen -W '$( command grep "^sqlplus" ~/.bash_history ) ' -- $cur ) )
}
------FILE-------

5 Jan 2008

oracle 10 on Linux

working with oracle now I wanted a system for experimenting. I find reporting tasks a lot easier to be done from a *nix system as from windows, altough I haven't used oracle so far (experiences from other db systems). Unfortunately my employer mostly favours windows.

So I have decided to install Oracle 10 on a linux system. The first install was tedous, I have decided to download the deb from oracle.com. After finding out there are some apt channels, I have added the following source to /etc/apt/sources.list and installed as follows:

# echo -en "\n# oracle 10\n >> /etc/apt/sources.list"
# echo -en "deb http://oss.oracle.com/debian unstable main non-free\n" >> \
/etc/apt/sources.list
$ wget http://oss.oracle.com/el4/RPM-GPG-KEY-oracle -O- | sudo apt-key add -
$ sudo apt-get update
$ sudo apt-get install -y oracle-xe oracle-xe-client cl-sql-oracle


run the post configuration script:
$ sudo /etc/init.d/oracle-xe configure


make sure the service is running:
$ sudo /etc/init.d/oracle-xe start


then add a new user (make it a dba)
<http://127.0.0.1:8080>

restart the database service:
sudo /etc/init.d/oracle-xe restart


generate a tns file in your home directory, save it unter ~/tnsnames.ora:
<FQDN> =
(DESCRIPTION =
(ADDRESS_LIST =
(ADDRESS =
(COMMUNITY = tcp.world)
(PROTOCOL = TCP)
(Host = 10.0.0.33)
(Port = 1521)
)
)
(CONNECT_DATA = (SID = <HOSTNAME>)
)
)


replace <FQDN> with fulyl qualified domain name and <HOSTNAME> with the actual hostname.

then you should be able to connect to your database. use sqlplus to do so:
$ sqlplus <user>/<pass>@<HOSTNAME>


Now you should have a setup with one database administrator.